
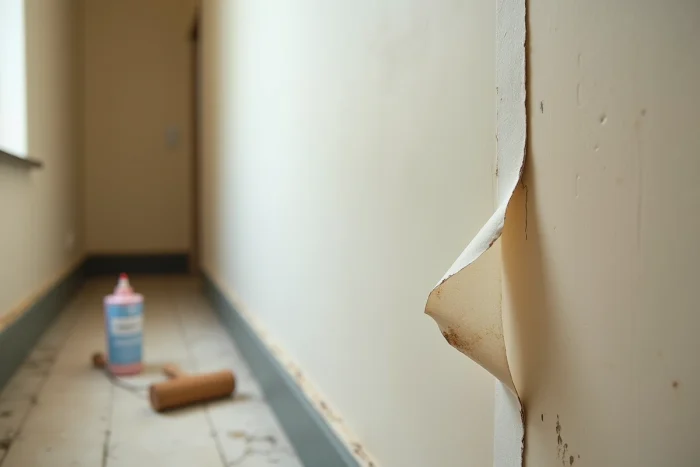
A non-woven wallpaper strip that bubbles, peels at the seams, or shows marks beneath the surface: these defects almost never come from the paper itself. The cause lies upstream, in the condition of the wall or in a poorly calibrated installation gesture. Understanding these mechanisms helps avoid having to redo the work a few weeks after completion.
Structural moisture in the wall: the invisible cause of peeling
Most guides recommend installing on a “dry and clean” wall. This advice is insufficient. A wall may seem dry on the surface while accumulating moisture deep down, especially at thermal bridges or poorly insulated areas.
Related reading : How to create an account on MyFoncia and simplify the management of your real estate documents
Thermal bridges, typical of homes renovated with partial insulation, cause condensation behind the covering. This moisture trapped between the wall and the non-woven fabric prevents the glue from drying properly. It also promotes the growth of mold that degrades adhesion over time.
Water infiltration is another factor. A crack in the facade, a faulty window joint, or rising damp is enough to compromise the entire installation. The glue never compensates for a structurally damp wall. Before rolling out the first strip, check the source of any moisture marks. A diagnosis with a surface hygrometer is inexpensive and prevents having to start over.
Further reading : Maintenance and tips to extend the lifespan of your football shoes
When a non-woven wallpaper installation issue occurs in the first few weeks, it is often this hidden moisture that is responsible.
Non-woven wallpaper on painted walls: why the paint fails before the glue
Have you ever noticed a strip peeling off, taking paint flakes with it? It’s not the glue that has failed. It’s the paint film that has detached from the wall.
This phenomenon, sometimes called “skin peeling,” occurs mainly on old oil-based paints or glossy, washable surfaces. The glue adheres to the paint film, not to the wall itself. If this film is not securely attached to the substrate, the entire system detaches.
Quick diagnosis of the paint film
Before installing a non-woven fabric on an already painted wall, test the stability of the existing film. Apply a piece of wide adhesive tape to the paint, press firmly, then pull it off quickly. If paint particles stick to the tape, the film is unstable.
- On old oil-based paint, lightly sand the surface with fine abrasive to create a mechanical grip, then dust off
- On satin or glossy paint, apply a universal bonding primer before gluing
- On paint that is already flaking, scrape all loose areas, fill, sand, and apply a bonding primer
Skipping this diagnostic step is one of the most common mistakes. The result may look correct for a few days, then the seams open and the edges gradually lift.
Transparency of the non-woven fabric: the trap of poorly uniformed walls
Recent non-woven papers are often thinner than one might think. On a heterogeneous background, the differences in shade of the substrate show through the covering. Repair patches, old wallpaper patterns, or simply darker plaster areas become visible once the strip is applied and dried.
A transparency defect cannot be corrected after installation. The strip must be removed, the wall treated, and then reinstalled. To avoid this situation, apply a uniform coat of matte white paint over the entire wall before installation. This primer neutralizes shade variations.
The color of the background is particularly critical with light or delicately patterned non-wovens. A dark or heavily textured non-woven will better mask imperfections in the substrate, but it will not eliminate the need for a clean and homogeneous background.
Gluing the wall and managing seams between strips
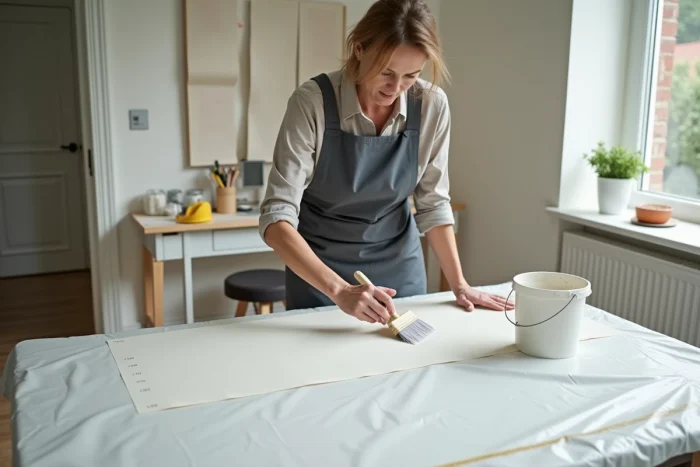
With non-woven wallpaper, the glue is applied directly to the wall, not to the paper. This simple principle generates two recurring mistakes.
Thickness and consistency of the glue application
A layer of glue that is too thin dries before the strip is in place. A layer that is too thick creates pockets of glue that form bumps under the surface. Glue a strip slightly wider than the wallpaper, extending a few centimeters on each side. Use a medium-pile roller for even application.
Opening of seams during drying
The seams between strips open when the glue dries too quickly, often due to drafts or active heating during installation. Close the windows and turn off the heating in the room during the entire drying period.
- Never place the strips edge to edge with even a minimal gap: natural shrinkage during drying would enlarge this gap
- Press each seam with a wallpaper roller, applying constant pressure from the center towards the edges
- On a wall with a substrate that absorbs glue heavily, apply a first layer of glue that you let dry, then a second just before installing the strip
A seam that opens after drying is difficult to repair without visible marks. It is better to slow down the installation and check each connection as you go.
Reference line and plumb: the error that accumulates from strip to strip
Installing the first strip without marking a vertical reference line with a plumb line or laser level seems innocuous. The wall angle appears straight, the strip seems aligned. The offset is only one or two millimeters on the first strip.
The problem is that each subsequent strip amplifies the plumb defect of the previous one. By the fifth or sixth strip, the offset can sometimes reach a centimeter, and the pattern matches no longer align. On a long wall, the result is visible to the naked eye.
Mark a vertical reference line on each new wall and after each corner. The angles of a room are almost never perfectly straight. If you use the angle as a guide, you import its defect across the entire series of strips.
The success of a non-woven installation relies less on skill than on the time spent diagnosing the substrate. A healthy, uniform wall with a stable paint film and controlled gluing yields a durable result, even for an occasional installer.